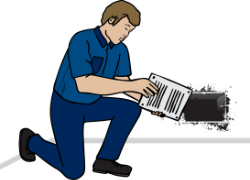
Dryer Duct Cleaning: A Practical, Code-Informed Guide for Safer, Faster Drying
Dryer duct cleaning sounds simple until you look closely at how many different “ducts” can exist between a dryer and the outdoors, and how each one behaves when lint, moisture, and heat combine. The right cleaning approach depends on the duct type, its length and routing, and the termination hardware at the exterior.
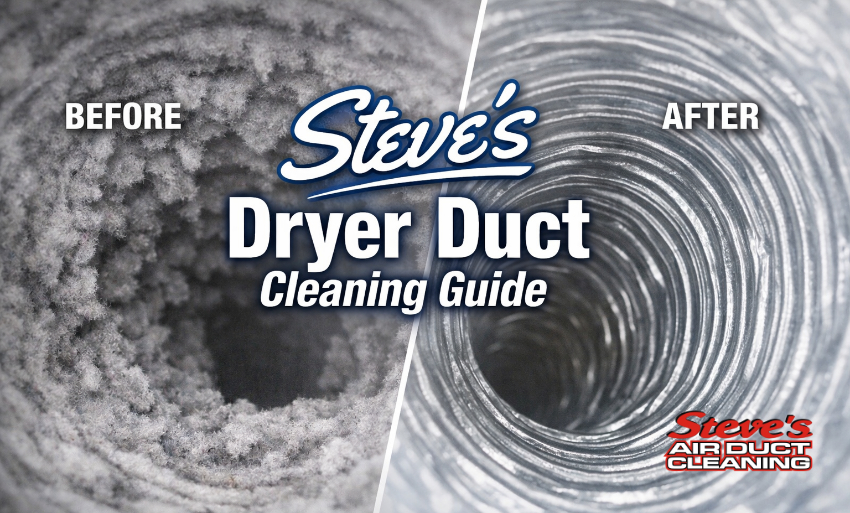
For homeowners, property managers, and light-commercial settings, a clean dryer exhaust system is about three things: fire risk reduction, appliance performance, and moisture control. NFPA research shows a significant share of home dryer fires involve operational issues, especially failure to clean, which often means lint accumulation and restricted airflow.[1] The U.S. Fire Administration similarly highlights “failure to clean” as a leading factor in dryer fires.[2] In real homes, restrictions rarely happen all at once; they build slowly an extra minute per cycle, a slightly hotter laundry room, a flap that doesn’t open fully until the system is stressed.
This guide breaks down common dryer duct types and the cleaning methods that work best for each, with code-informed guardrails to keep your system safe and serviceable.
Table of Contents
- First, define the two duct zones: “transition” vs. “exhaust”
- Dryer duct types and the cleaning method that fits
- 1) Cleaning UL 2158A transition ducts (behind the dryer)
- 2) Cleaning rigid smooth metal exhaust ducts (the “gold standard”)
- 3) Cleaning semi-rigid corrugated metal ducts (short permanent runs)
- 4) Long, concealed, or vertical runs: treat as a “system,” not a tube
- 5) Exterior terminations: the choke point most people forget
- Signs your dryer duct needs cleaning (or repair)
- What a professional dryer duct cleaning should include
- A simple maintenance plan that actually works
- Steve's Can Help
- References
First, define the two duct zones: “transition” vs. “exhaust”
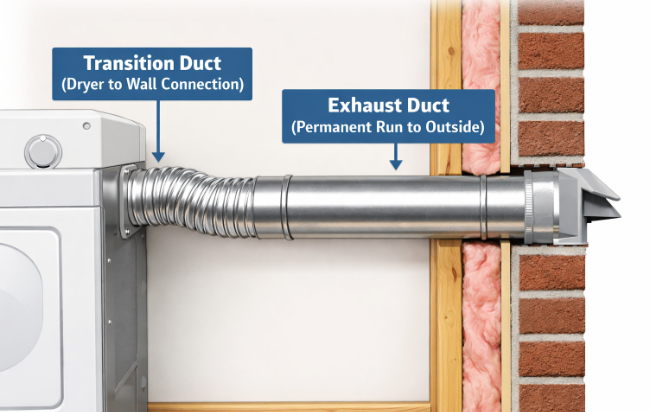
Most dryer vent systems have two distinct parts:
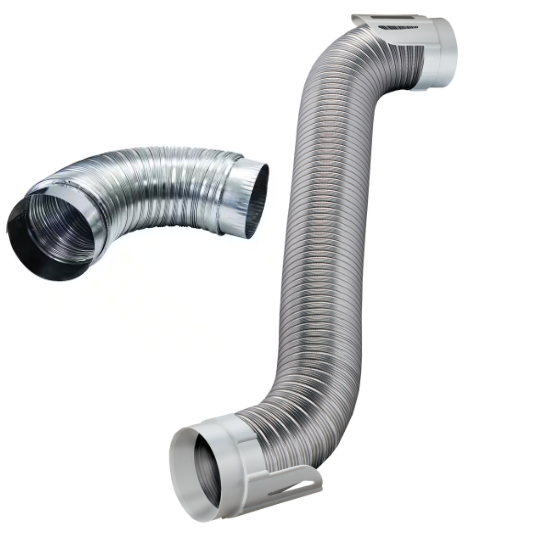
- Transition duct (dryer to wall/ceiling connection):
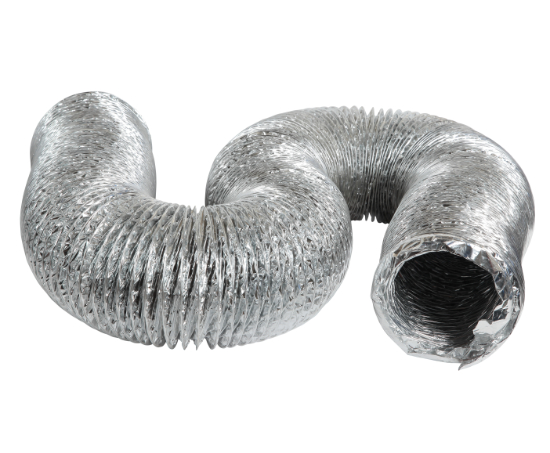
This is the short connector behind the dryer. Modern residential code language commonly limits transition ducts to a single listed and labeled length (UL 2158A) and not more than 8 feet, and it should not be concealed in walls or cavities.[3][4] - Exhaust duct (the permanent run to the outside):
This is the duct installed through the home (behind walls, in basements, crawlspaces, attics, etc.) that terminates outdoors. Code language commonly requires a smooth interior, metal construction, and a nominal 4-inch diameter, with additional rules about fastening and avoiding screws that protrude into the airstream.[3] Many jurisdictions also prohibit flexible ducting for the permanent run (except the transition section).[5]
These distinctions matter because the transition duct is often the “kink point,” while the permanent exhaust duct is where lint can accumulate over distance, elbows, and terminations.
Dryer duct types and the cleaning method that fits
Below is a practical map of the most common dryer duct configurations and how they should be cleaned.
| Duct / System Type | Where You’ll See It | Primary Risk Pattern | Best Cleaning Method |
|---|---|---|---|
| UL 2158A transition duct (semi-rigid metal) | Behind dryer; short runs | Minor corrugations can hold lint; kinks reduce airflow | Detach, brush + vacuum, reshape, re-clamp; replace if crushed |
| UL 2158A transition duct (foil-type flexible) | Tight spaces; closets | Easily crushed; traps lint; prone to tearing | Often best to replace rather than “deep clean” if damaged |
| Rigid smooth metal duct (galvanized/aluminum) | Permanent run through home | Lint accumulates at elbows/low spots; terminations stick | Rotary brush system + high-CFM vacuum; clean from both ends when possible |
| Semi-rigid corrugated metal duct (permanent run) | Short permanent runs | Corrugations hold lint; turbulence increases buildup | Soft/medium brush with strong vacuum; more passes, slower feed |
| Long, vertical, or concealed run | Multi-story, attic/roof terminations | Hard-to-reach lint shelves; disconnections hidden | Professional rotary brushing + negative air; camera verification recommended |
| Systems with exhaust power ventilator | Long equivalent lengths | Lint load at fan housing; performance depends on spec | Clean duct + fan housing per manufacturer; verify airflow after |
| Exterior termination hood (flapper/louver) | Outside wall/soffit/roof | Stuck damper; lint mat at outlet; bird nests | Hand-clean termination + brush last 3–6 feet; ensure full damper movement |
1) Cleaning UL 2158A transition ducts (behind the dryer)
What it is: The short connector from the dryer outlet to the home’s exhaust duct. Modern code language commonly expects it to be listed and labeled to UL 2158A and not longer than 8 feet.[3][4]
Cleaning approach (safe and effective):
- Power off / disconnect the dryer (and shut off gas if applicable, with appropriate caution).
- Detach the transition duct at both ends if accessible.
- Vacuum loose lint at the dryer outlet, the wall collar, and inside the duct.
- Use a small rotary or manual brush and feed it carefully through the duct while vacuuming from the opposite end.
- Inspect the duct material: if it’s crushed, torn, heavily kinked, or cannot hold shape, replacement is usually the safest choice.
- Reinstall with proper clamps and route it with the widest possible bends—no sharp kinks.
Why this matters: The Consumer Product Safety Commission warns that flexible plastic or foil accordion-style ducting can trap lint and kink or crush easily, reducing airflow; it advises replacing plastic/foil accordion ducting with rigid or corrugated semi-rigid metal duct for better airflow.[6]
2) Cleaning rigid smooth metal exhaust ducts (the “gold standard”)
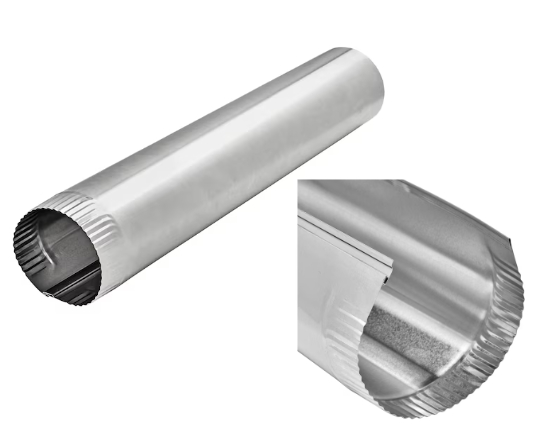
What it is: Smooth-wall metal duct that runs from the transition connection to the exterior termination.
Why it’s preferred: Code language commonly calls for a smooth interior finish, metal construction, and 4-inch nominal diameter.[3] Smooth metal has less turbulence and fewer lint “grab points,” so it tends to stay cleaner longer and dry more efficiently. This is assuming the run is sized and routed well.
Best-practice cleaning method:
- Mechanical agitation + capture is the most thorough: a rotary brush system feeding through the duct while a high-volume vacuum maintains negative pressure to keep lint from dispersing.
- Pay special attention to:
- Elbows (90s and tight 45s)
- Horizontal runs with slight sags
- Transitions in duct material or diameter
- The last 3–6 feet before the termination (common lint-mat zone)
- Finish by cleaning the termination hood and confirming the damper opens freely.
Code-informed note: Modern code language also commonly warns against screws or fasteners that protrude into the duct more than a small amount, because they catch lint.[3]
3) Cleaning semi-rigid corrugated metal ducts (short permanent runs)
Semi-rigid metal is common where rigid pipe won’t fit, but its corrugations can collect lint faster than smooth duct.
Cleaning approach:
- Use a softer brush than you would for rigid pipe to avoid tearing the liner (especially if the duct is thin).
- Make more passes as the lint tends to hide in corrugation valleys.
- Maintain strong vacuum capture. Lint that breaks loose without capture tends to re-settle downstream.
If a semi-rigid permanent run is long or heavily bent, it may be worth discussing an upgrade to smooth rigid metal where feasible for better long-term performance.
4) Long, concealed, or vertical runs: treat as a “system,” not a tube
A dryer vent that disappears into a wall or travels vertically to a roof termination can’t be cleaned well with a quick “blow and go.” These systems often need two-end access (interior connection + exterior termination) and professional-grade equipment.
What changes with long runs:
- The “effective length” grows with each elbow and fitting. Mechanical codes commonly cap dryer exhaust ducts at 35 feet maximum, with reductions for fittings unless manufacturer instructions allow otherwise.[3][4]
- Modern codes also address how to handle long equivalent lengths (e.g., labeling requirements when the equivalent length exceeds 35 feet, and guidance around power ventilators).[4][7]
Professional method that works:
- Inspection first (routing, material, disconnections, crushed sections).
- Rotary brushing from one end while maintaining negative air from the other.
- Termination cleaning (roof caps and wall hoods often hide dense lint mats).
- Verification: airflow, damper movement, and (ideally) visual confirmation in problem sections.
Warm, practical truth: This is where a careful technician earns their keep because the most dangerous clogs are often the ones you can’t see.
5) Exterior terminations: the choke point most people forget
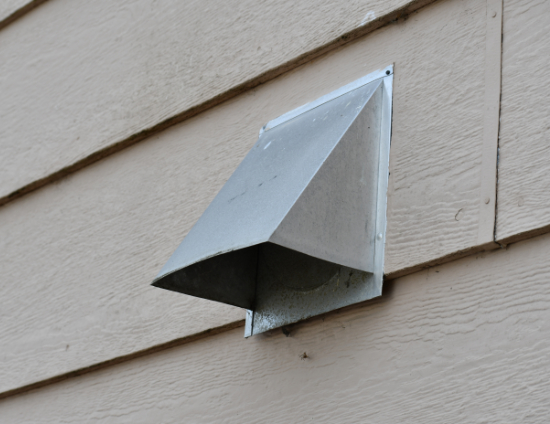
Exterior hoods are exposed to weather, pests, and lint discharge. They fail in predictable ways:
- Dampers stick shut or only open partially.
- Lint forms a “felt pad” behind louvers.
- Bird nests or debris block the outlet.
Modern code language commonly discourages screens at dryer exhaust terminations because they can trap lint.[3] If you have a pest guard, it should be designed not to act like a lint filter and it should be inspected regularly.
Cleaning approach:
- Remove accumulated lint by hand and vacuum.
- Confirm full damper swing/opening.
- Brush/vacuum the last several feet of duct leading to the hood.
Signs your dryer duct needs cleaning (or repair)
If you notice any of the following, it’s time to inspect and likely clean:
- Drying times increase or clothes feel hot but still damp.
- The laundry room feels unusually warm or humid during operation.
- A burning smell or “hot lint” odor.
- The exterior damper barely opens (or doesn’t open at all).
- Excess lint appears around the dryer or behind it.
NFPA data indicates lint and dust are frequent first-ignited materials in dryer fires, reinforcing that airflow restriction and lint accumulation are not just “efficiency issues.”[1]
What a professional dryer duct cleaning should include
A complete service should be more than pushing a brush through a line:
- Confirm duct material and configuration (especially whether flexible materials are present where they shouldn’t be).
- Clean the transition duct, permanent duct, and termination as a single system.
- Use agitation + capture (not just air pressure that redistributes lint).
- Check for crushed sections, disconnects, unsafe fasteners, and poor routing.
- Provide clear recommendations if the system violates common safety guidance (e.g., damaged accordion ducting) per CPSC safety messaging.[6]
A simple maintenance plan that actually works
Between professional cleanings, small habits keep the system safer:
- Clean the lint screen every load.
- Keep the area behind the dryer clear of lint and storage.
- Avoid overloading the dryer (more lint, more heat, longer cycles).
- Watch the exterior flap periodically and if it’s sluggish, don’t ignore it.
Steve's Can Help
Dryer duct cleaning is one of the few home maintenance tasks where better performance and better safety are the same outcome: restore airflow and you reduce heat stress, shorten run times, and lower risk. When the duct type and routing are matched with the right cleaning method (especially in long or concealed runs) the result is a system that works the way it was intended to.
If you’d like help evaluating your setup, Steve’s Air Duct Cleaning can inspect the full dryer exhaust path, identify the duct types in play, and recommend the safest and most effective cleaning approach for your home.
Need Professional Dryer Duct Cleaning?
Schedule an inspection and cleaning with Steve's Air Duct Cleaning.References
- NFPA Research. Home Dryer Fires (June 2020). https://content.nfpa.org/-/media/Project/Storefront/Catalog/Files/Research/NFPA-Research/US-Fire-Problem/osdryer.pdf
- U.S. Fire Administration (FEMA). Appliance and Electrical Fire Safety (home fire prevention messaging; dryer fires and “failure to clean”). https://www.usfa.fema.gov/prevention/home-fires/prevent-fires/appliance-and-electrical/
- 2021 International Residential Code (IRC) — Section M1502 (Dryer Exhaust Ducts) (excerpted). https://dryerbox.com/sites/default/files/conversions/pdfs/code/2021-IRC-1502.pdf
- City of Seattle. 2021 Denver Residential Code, Chapter 15 (Exhaust Systems) (includes dryer exhaust duct length, labeling, and related provisions). https://up.codes/viewer/denver/irc-2021/chapter/15/exhaust-systems#15
- Colorado Division of Fire Prevention & Control. FLS Adopted Codeshttps://dfpc.colorado.gov/sections/fire-and-life-safety/fls-adopted-codes
- U.S. Consumer Product Safety Commission. Overheated Clothes Dryers Can Cause Fires (Publication 5022; recommends replacing plastic/foil accordion ducting with rigid or corrugated semi-rigid metal and cleaning behind dryer). https://www.cpsc.gov/s3fs-public/5022.pdf
- 2021 International Mechanical Code (IMC) — Section 504 (Clothes Dryer Exhaust) (excerpted; duct length, fitting equivalents, labeling, transition duct limits). https://dryerbox.com/sites/default/files/conversions/pdfs/code/2021-IMC-504.pdf
Start Breathing Easier.
Your air ducts are the lungs of your home and keeping them clean keeps you and your family healthier and your HVAC equipment working optimally.